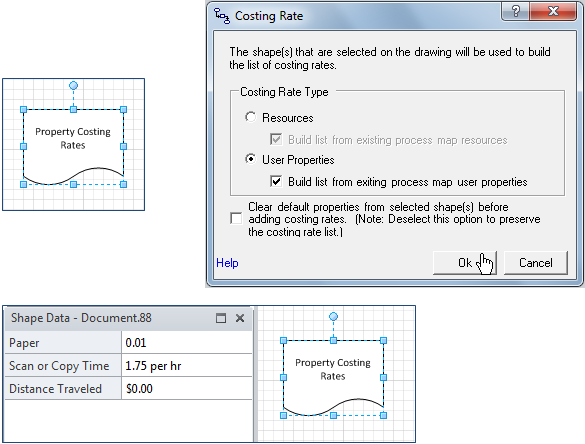
This will open the Costing Rates dialog. Note that this feature can be used to describe the cost associated with time-based and quantity-based user properties or resource time. Select the ‘User Properties’ option and, if this is the first time you are using the Costing Rates dialog, leave the ‘Clear default properties from…’ option checked, and click Ok.
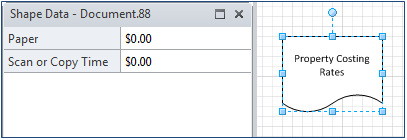
This will review the active page and compose a list of all the user properties identified in the flow. This list will be written to the shape data window of the selected shape.
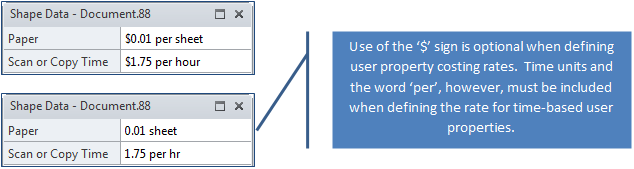
Enter the cost per unit of time associated with each time-based property and the cost per quantity for each of the quantity-based properties in the list. Note that use of the ‘$’ symbol is optional.
When defining the costing rates for quantity-based properties, be consistent in terms of the unit of measure. If, for example, the values for a ‘distance traveled’ attribute have been defined in feet (ft), the rate should be defined as the cost per foot. ProcessView performs time unit conversions, but will not handle unit conversions for quantity-based properties.
In the example below, the ‘Paper’ attribute values were defined in terms of sheets; the rate is therefore defined as the cost per sheet.
When defining rates for time-based user properties, time units must be incorporated in the costing rate definition.
Add User Properties to an Existing Costing Rate List
Once a costing rate list has been defined for the user properties in a business process, if new user properties are added to the model, simply select the Costing Rate shape and return to the Costing Rate dialog to incorporate the new properties into the list. Note that, once the list has been defined, the ‘Clear default properties from…’ option should be unchecked.
Remove User Properties from an Existing Costing Rate List
To remove unwanted user properties from a costing rate list, right-click in the costing rate shape’s shape data window and choose to ‘Define Shape Data’. This will open the Define Shape Data dialog where the delete key may be used to remove the unwanted items from the list.


